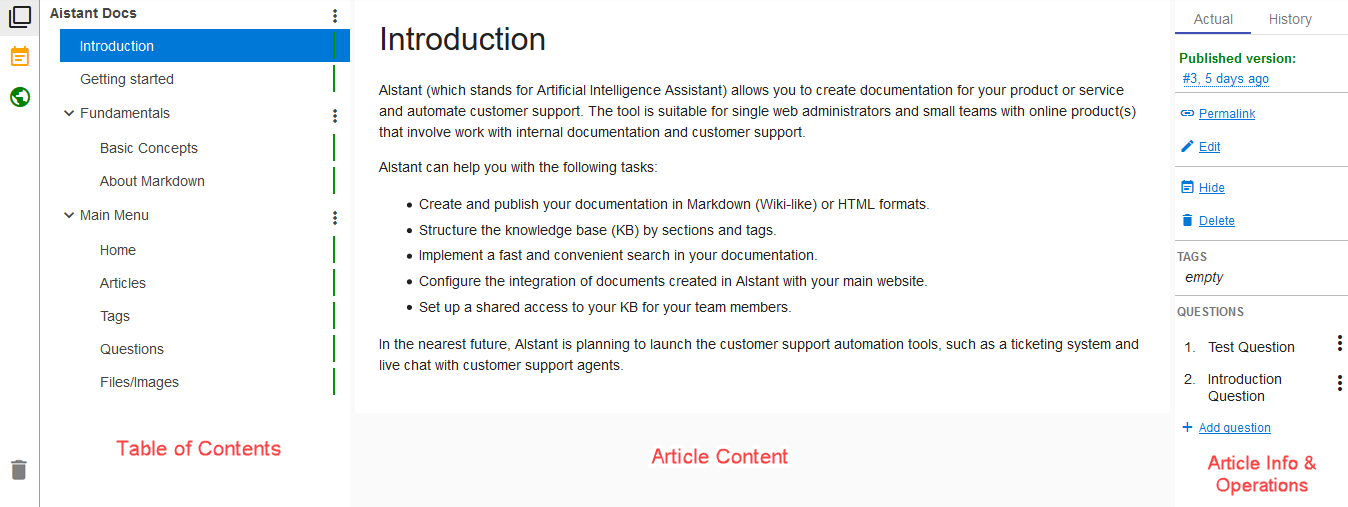
On the Articles page, you can add new articles, edit the existing ones, and organize them into sections. Actually on this page you create your knowledge base with documentation. The page has the following structure:

- The panel on the left displays the contents of the KB - hierarchically organized sections and articles within those sections.
- The panel in the middle displays the content of the article that you have selected in the panel on the left.
- The panel on the right displays additional information about the selected article and available actions.
Table of Contents
In the table of contents on the left, you can do the following:
- Use the filtering options:
 Display both the drafts and published articles.
 Display only those articles that have unpublished drafts.
 Display only the published articles. This is how the user sees the KB content.
 Display the deleted articles.
- Add new sections and articles via the
 icon
icon - Delete existing sections and articles via the
 icon
icon - Move the sections and articles by using the drag-and-drop functionality
Article Info & Operations
The panel on the right is divided into two tabs: Actual, with information related to the current state of the article, and History, with the history of all changes made to the article.
Actual Tab

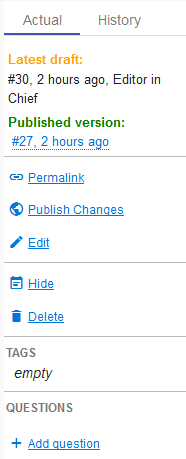
The Actual tab gives access to the following information and functionality:
- Latest draft: Information about the recent draft of the article that has been created, i.e. number of the draft, creation time, and author.
- Published version: A link to the recent version of the article that has been published. Please note that the current version of the article is a draft, whereas the previous version is published.
- Permalink: An external link that you can use to share the article with others. The article will be available under its permalink after you click Publish. If the article has not been published yet, the users do not see it under the URL under the permalink.
- Publish Changes: Publish the recent article draft. This option is visible only for article drafts.
- Edit: Open the editing mode where you can edit and publish the article draft.
- Hide: Unpublish the article and revert it to the draft state. This option is visible only for published articles.
- Delete: Move the article from the KB to the Deleted folder. To open the Deleted folder, click the
 icon in the lower-left corner of the KB page. The Deleted folder offers two options - Restore (move the article from the Deleted folder back to the KB) and Delete permanently (remove the article from the KB, making it impossible to recover).
 - Tags/Questions: Tags and questions related to this article.
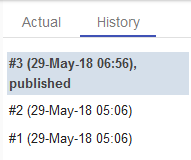
History Tab

The History tab contains a list of all changes made to the article. Each element of the list contains the version number and date when the article was changed. One of the list elements is the published article, and therefore this element is marked as "published". You can revert the article to any of the versions via the ![]() icon.
icon.
Editing Mode
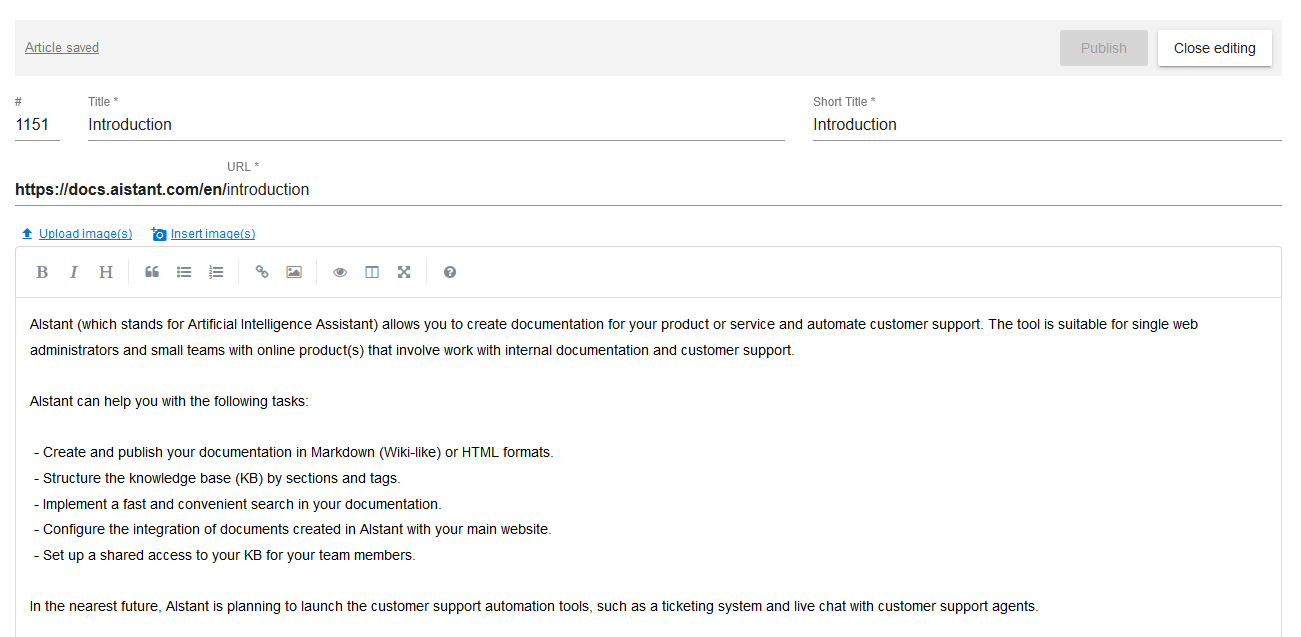
 When you click Edit in the panel on the right, you will open the article in the editing mode. After you make a first change, AIstant automatically creates a new version and the article is saved as a draft. All changes are automatically saved to the current draft without making any changes to the published version.
The editing mode provides the following fields:
- #: Internal number of the article, which you can later use to quickly find it.
- Short Title: Variant of the article title displayed in the contents.
- URL: The article URL is automatically generated from the article title that you enter after you click Add Article. You can change only the last part of the URL. IMPORTANT: If you change the URL, the users will not be able to find the article under the old URL.
- Upload image(s): Upload the images to AIstant from external source. As a result, they will be available on the Files/Images page.
- Insert image(s): Insert the images to a specific place in the article body. These images should have been already uploaded and available on the Files/Images page.
- Toolbar: If you have chosen the Markdown format for your article, the editor will also have a toolbar with standard formatting options and a link to a short Markdown guide.
- Excerpt: Enter a couple of sentences that will be shown as article preview in search results.
To quickly add another article to the current section, click the + icon in the lower-right corner of the Articles page.
For more information on how to add and edit an article as well as how to add sections and tags, see Getting started article.

